DIY leak repairs require proper identification of common signs, including unexpected water bill increases, damp spots, and dripping sounds. Essential tools for repairs include adjustable wrenches, plumber's tape (for sealing threaded connections), and epoxy putty (for temporary seals). Before starting any repair, shut off the main water supply and confirm proper safety equipment, including protective eyewear and chemical-resistant gloves. Quick temporary fixes involve using epoxy putty for small holes, self-fusing silicone tape for immediate barriers, and pipe repair clamps for flexible pipes. While basic repairs are manageable, complex issues with main water lines or extensive damage require professional intervention. Understanding preventive maintenance techniques can help avoid future plumbing emergencies.
Highlights
- Always turn off the main water supply and gather essential tools like adjustable wrenches, plumber's tape, and epoxy putty before starting repairs.
- Identify leaks through signs like unexplained water bill increases, damp spots on walls, or dripping sounds in quiet areas.
- Use temporary fixes like self-fusing silicone tape or pipe repair clamps for immediate solutions until professional help is available.
- Wear protective gear including chemical-resistant gloves and eyewear, and ensure the work area is dry and hazard-free.
- Contact a professional plumber if leaks persist after repairs, water damage spreads, or you notice mold growth.
Common Signs of Plumbing Leaks
Several telltale signs can alert homeowners to potential plumbing leaks before they become major problems. One of the most reliable indicators is an unexplained increase in water bills, which typically suggests pipe leaks accounting for at least 10% of total water usage.
Key Indicators of Water Leaks:
- Visible damp spots on walls or ceilings, indicating water accumulation behind surfaces
- Dripping sounds in quiet areas, particularly noticeable during nighttime hours
- Unusual movement in the water meter when no fixtures are in use
- Moisture or water stains around pipe connections and joints
Regular inspections of plumbing systems play an essential role in early leak detection. Homeowners should examine exposed pipes monthly, paying special attention to areas under sinks, behind toilets, and near water heaters.
This proactive approach helps prevent extensive water damage and potential mold growth, which can develop in as little as 48 hours in damp conditions.
Professional Tip: When checking the water meter, record the reading, avoid using water for two hours, then check again. Any change in the reading indicates a possible leak requiring immediate attention.
Essential Tools for Leak Repair
A well-equipped leak repair toolkit combines basic hand tools, emergency supplies, and specialized plumbing equipment to handle various types of water emergencies.
Essential items include an adjustable wrench for tightening fittings, plumber's tape for sealing threaded connections, and self-fusing silicone tape for temporary fixes on non-threaded pipes.
Advanced repairs may require specialty tools like pipe cutters and epoxy putty, which enable precise repairs and create durable patches for damaged plumbing components.
Basic Tool Kit Essentials
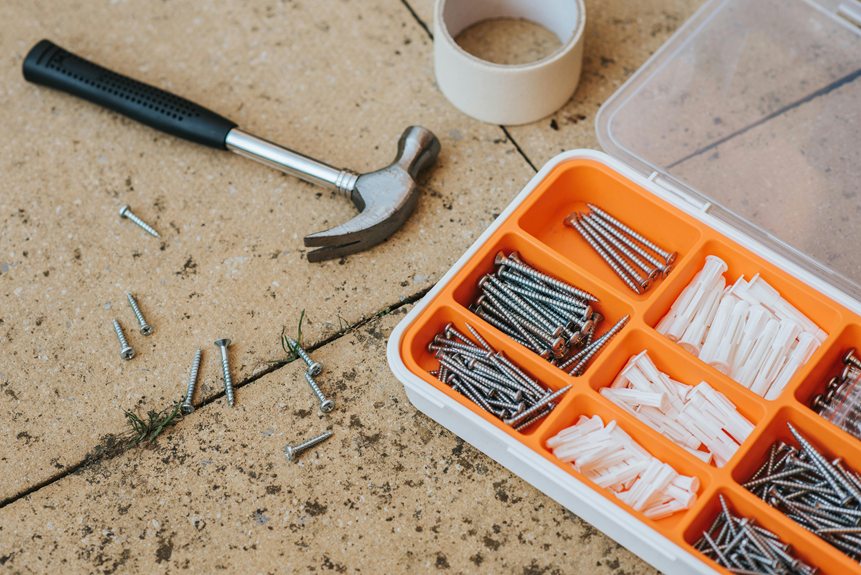
Every successful DIY leak repair begins with a well-equipped tool kit containing essential instruments and materials. A quality adjustable wrench serves as the foundation of any repair kit, allowing for precise manipulation of various pipe fittings and connections.
For effective leak detection and repair, several specialized materials are vital. Plumber's tape, also known as Teflon tape, creates a watertight seal when properly wrapped clockwise around threaded pipe connections. Self-fusing silicone tape provides a reliable solution for temporary repairs on non-threaded pipes, forming a strong bond when stretched and applied with proper tension.
Essential tools for addressing damaged sections include:
- A pipe cutter for clean, precise removal of compromised pipe segments
- Epoxy putty for sealing small cracks and holes
- Repair clamps for emergency pipe stabilization
When assembling your kit, make certain all materials are readily accessible and properly organized. Each tool serves a specific purpose in the repair process, from initial leak detection to final sealing.
Keep materials dry and stored in a dedicated container, ready for immediate use when plumbing emergencies arise.
Emergency Repair Supplies
The most critical emergency repair supplies can mean the difference between a minor inconvenience and a major plumbing disaster. When facing emergency leak repairs, having the right tools readily available guarantees quick and effective solutions.
| Essential Supply | Primary Function |
|---|---|
| Adjustable Wrench | Tightening fittings and securing pipe connections |
| Plumber's Tape | Creating waterproof seal on threaded connections |
| Self-fusing Silicone Tape | Temporary repairs on non-threaded pipe sections |
| Epoxy Putty | Sealing small holes and cracks in pipes |
| Hose Clamps | Securing repairs on flexible piping |
For immediate leak repair success, organize supplies in an easily accessible location. Apply plumber's tape by wrapping clockwise around clean, dry threads, guaranteeing proper sealing. When using self-fusing silicone tape, maintain consistent tension while overlapping each layer by 50% to create an effective waterproof seal. Epoxy putty requires thorough surface preparation and drying time for maximum adhesion. Always keep cleanup towels nearby for water management during repairs. Store these supplies together in a dedicated container, allowing for quick access during emergencies when every second counts.
Specialty Tools Guide
Building on basic emergency supplies, specialized plumbing tools elevate leak repair capabilities to a professional level. Each tool serves a specific function, from creating watertight seals to guaranteeing proper component alignment during repairs.
Essential plumbing tools for leak repair include:
- Adjustable wrench – Required to tighten the nuts and fittings securely, preventing future leaks through proper torque application.
- Plumber's tape (Teflon tape) – Creates reliable seals on threaded connections when wrapped clockwise around clean pipe threads.
- Self-fusing silicone tape – Provides a temporary fix for non-threaded pipes by forming a waterproof barrier around the leaking area.
- Pipe cutter – Enables clean, precise cuts when removing damaged pipe sections for replacement.
Additional specialized items like epoxy putty complement these primary tools, offering solutions for small leak repairs through moldable application.
When selecting repair tape or sealing materials, consider the pipe material and pressure requirements to guarantee compatibility.
Professional-grade tools might cost more initially but deliver superior results and durability compared to basic alternatives.
Keep these tools organized and readily accessible in a dedicated toolkit for quick response to emergency situations.
Quick Temporary Fix Methods
Sudden plumbing emergencies require quick solutions to prevent water damage and minimize disruption. Understanding various quick fix methods can help homeowners manage leaks until professional repairs are possible.
Several temporary solutions offer effective short-term relief:
- Epoxy putty provides a reliable temporary seal for small leaks, as it can be molded directly over the affected area and hardens within hours at room temperature.
- Self-fusing silicone tape creates an immediate watertight barrier when stretched and wrapped tightly around the leak area, particularly effective for low-pressure pipe breaks.
- Pipe repair clamps, equipped with rubber gaskets, offer a straightforward solution for flexible pipe leaks and require minimal technical expertise to install.
- Plumber's tape, when properly wrapped around threaded connections, helps establish watertight connections and prevents leaks at worn joints.
For PVC pipes specifically:
- Slip couplings can effectively cover damaged sections.
- Always use appropriate PVC primer before applying glue.
- Allow sufficient drying time for a proper seal.
Remember: These solutions are temporary measures and should be followed by permanent repairs from a qualified plumber.
Safety Precautions Before Starting
Before attempting any DIY plumbing repairs, safety must be the foremost priority to prevent injuries and minimize property damage. Taking proper precautions not only guarantees personal protection but also helps maintain a controlled environment for effective repairs.
To guarantee a safe repair process, follow these essential steps:
- Turn off the water supply at the main shut-off valve, which is typically located near your water meter or where the main line enters your home, to prevent flooding and water damage during repairs.
- Wear appropriate safety gear, including chemical-resistant nitrile gloves and protective eyewear, to protect against chemical burns from cleaning agents and potential sharp edges on pipes or fittings.
- Clear and dry the work area thoroughly, removing all obstacles and moisture to reduce risk of slips and falls while handling tools and materials during the repair process.
- Keep essential safety items within reach, including a first aid kit for minor injuries, and guarantee all tools are used according to manufacturer instructions to prevent accidents and guarantee proper repair execution.
Regular maintenance of your safety equipment and familiarity with emergency procedures will contribute to a secure repair environment.
When Professional Help Is Needed
While DIY repairs can address many common plumbing issues, certain situations demand the expertise of a licensed professional plumber. When attempting to repair the leak becomes challenging or potentially dangerous, it's vital to recognize when to seek professional assistance.
Signs You Need a Professional:
- Persistent leaks that return despite multiple attempts to fix the plumbing fixture
- Water damage extending beyond the immediate leaky area, potentially causing structural damage
- Signs of mold growth or musty odors after attempting to turn the water supply off and repair
- Underlying plumbing issues that require specialized tools or expertise
- Major plumbing repairs involving main water lines or complex system components
Essential Scenarios Requiring Immediate Professional Help:
- Burst pipes causing extensive damage to walls, floors, or ceilings
- Multiple leaks indicating systemic plumbing problems
- Water pressure issues affecting the entire property
- Signs of water contamination or backflow problems
- Age-related deterioration in older plumbing systems
Remember: If you're unsure about your ability to safely address a plumbing issue, it's always better to contact a licensed professional rather than risk causing additional damage or creating health hazards.
Preventive Maintenance Tips
Implementing a regular inspection schedule for your plumbing system can prevent costly emergencies and extend the life of your pipes, with monthly visual checks serving as a baseline minimum.
Proper pipe insulation, particularly in crawl spaces and unheated areas, requires foam sleeves or heat tape rated for your specific pipe diameter and local climate conditions.
Installing a water pressure gauge at your main water line allows for consistent monitoring of system pressure, which should maintain 40-60 psi (pounds per square inch) for ideal performance and pipe longevity.
Regular Inspection Schedule
A home's plumbing system requires consistent monitoring to prevent costly water damage and repairs. Implementing a regular inspection schedule, typically every six months, allows homeowners to identify potential leaks before they develop into major issues.
During these routine checks, careful examination of visible pipes for moisture, water stains, and signs of deterioration becomes essential for maintaining system integrity.
An effective inspection routine should include the following key components:
- Water meter monitoring to track unexpected increases in usage, which often indicates hidden leaks within walls or underground pipes.
- Systematic examination of all visible pipes, including those under sinks and in basement areas, checking specifically for corrosion, dampness, or discoloration.
- Testing of faucets, toilets, and water-using appliances for unusual sounds or dripping, as these symptoms typically suggest developing issues.
- Documentation of all findings and maintenance actions in a detailed log, enabling tracking of recurring problems.
Proper Pipe Insulation
Effective pipe insulation stands as a critical preventive measure against leaks and water damage in residential plumbing systems. Proper pipe insulation helps prevent freezing during cold weather while simultaneously working to reduce leaks and lower energy costs through improved temperature regulation.
| Area | Insulation Type | Maintenance Need |
|---|---|---|
| Attic | Foam Sleeve | Quarterly Check |
| Basement | Fiberglass Wrap | Bi-annual Inspection |
| Crawl Space | Foam Tape | Monthly Review |
| Exterior Walls | Rubber Foam | Seasonal Assessment |
| Utility Room | Multi-layer Foam | Semi-annual Check |
To maximize protection, homeowners should focus on installing foam pipe insulation or fiberglass materials around all exposed pipes, particularly in vulnerable areas where temperature fluctuations occur frequently. The process requires careful attention to sealing gaps and preventing condensation buildup, which can compromise insulation effectiveness over time.
Key Implementation Steps:
- Measure pipe diameter for proper insulation fit
- Seal all joints and connections thoroughly
- Regularly inspect insulation for signs of wear
- Replace damaged sections immediately
- Monitor effectiveness during extreme weather
Maintaining insulated pipes requires consistent attention to guarantee maximum protection against leaks and thermal stress, with quarterly inspections recommended for peak performance.
Water Pressure Monitoring
Regular water pressure monitoring serves as a cornerstone of preventive plumbing maintenance, with ideal pressure ranges between 40-60 psi essential for residential system longevity. Homeowners should install a water pressure gauge to track fluctuations and identify potential plumbing issues before they escalate into costly repairs.
Excessive pressure can strain pipes and accelerate wear on fixtures, making routine monitoring vital for preventing water damage. A pressure-reducing valve installation provides an effective solution for regulating water flow entering the home, protecting plumbing systems from unnecessary stress.
Key Monitoring Steps:
- Install a water pressure gauge at an exterior spigot or utility sink to establish baseline readings.
- Check pressure readings monthly, documenting any significant changes that may indicate underlying issues.
- Inspect visible pipes and fixtures regularly for signs of leaks, corrosion, or unusual sounds.
- Monitor water bills for unexpected increases, which could signal hidden leaks or pressure-related problems.
When fluctuations occur, assess whether the issue stems from municipal supply changes or internal plumbing problems.
Professional evaluation may be necessary if pressure readings consistently fall outside the recommended range or if multiple signs of stress appear within the system.
Frequently Asked Questions
Can I Fix a Water Leak Myself?
Minor leaks can be addressed using DIY kits and plumbing tools for temporary fixes and cost savings. However, significant water damage requires professional leak detection. Always prioritize proper repair materials and emergency measures for safety.
How to Stop a Leaking Pipe With Water in It DIY?
Turn off water supply, dry the area, and apply self-fusing silicone tape or epoxy putty around the leak. For emergency repairs, use pipe clamps with rubber gaskets. These temporary solutions work until professional repairs can be made.
How to Fix a Leaking Pipe Without Replacing It?
Address pipe repair through temporary solutions like plumber's tape, silicone tape, epoxy putty, or pipe clamps. Detect leaks early and use appropriate plumbing tools to tighten connections before considering more extensive repairs.
How to Fix Roof Leak DIY?
Begin with roof inspection tips to identify leak sources. Use essential tools and sealant application techniques for temporary fixes. Implement long-term solutions with cost-effective materials, following safety precautions. Call professionals for complex repairs.


