To identify plumbing leaks at home, start by monitoring your water meter: turn off all water sources, record the initial reading, and check for changes after 2-3 hours. Inspect under-sink cabinets for dampness, discoloration, or musty odors. Check toilet tanks by adding food coloring to detect seal leaks, and listen for unexpected dripping sounds when all fixtures are off. Examine walls near plumbing for yellow stains or bubbling paint, and investigate unusually green patches in your yard that could indicate underground leaks. Regular inspection of these key areas helps prevent costly water damage and reveals the full scope of potential plumbing issues.
Highlights
- Monitor your water meter by turning off all water sources and checking for changes after 2-3 hours to detect hidden leaks.
- Check under-sink cabinets for water stains, dampness, musty odors, or warped materials indicating potential plumbing issues.
- Add food coloring to toilet tanks and wait; if color appears in the bowl without flushing, there's a leak.
- Listen for unexpected dripping or hissing sounds when all water fixtures are turned off.
- Look for unusual wet spots, greener grass patches, or consistently damp areas around your property's exterior.
Monitor Your Water Meter
When it comes to detecting plumbing leaks, monitoring your water meter serves as one of the most reliable diagnostic tools available to homeowners.
To perform an accurate water meter test, follow these essential steps:
- Turn off all water sources in your home, including faucets, appliances, and irrigation systems.
- Locate your water meter and record the initial reading.
- Wait 2-3 hours without using any water.
- Check the meter again for any changes in the reading.
Signs of a plumbing leak include movement in the leak indicator or any change in the meter reading during your monitoring period.
To find a leak effectively, observe the meter's dial for even slight movements, as these can indicate slow leaks that might otherwise go unnoticed.
Important Considerations:
- Regular monitoring helps identify issues before they become major problems.
- Homeowners are responsible for leaks occurring after the meter.
- Underground leaks may not show visible signs but will register on the meter.
- Consistent water meter checks can prevent wastage of up to 10,000 gallons annually.
Remember that unusual spikes in water usage often indicate hidden plumbing issues requiring immediate attention from a qualified professional.
Check Inside Kitchen Cabinets
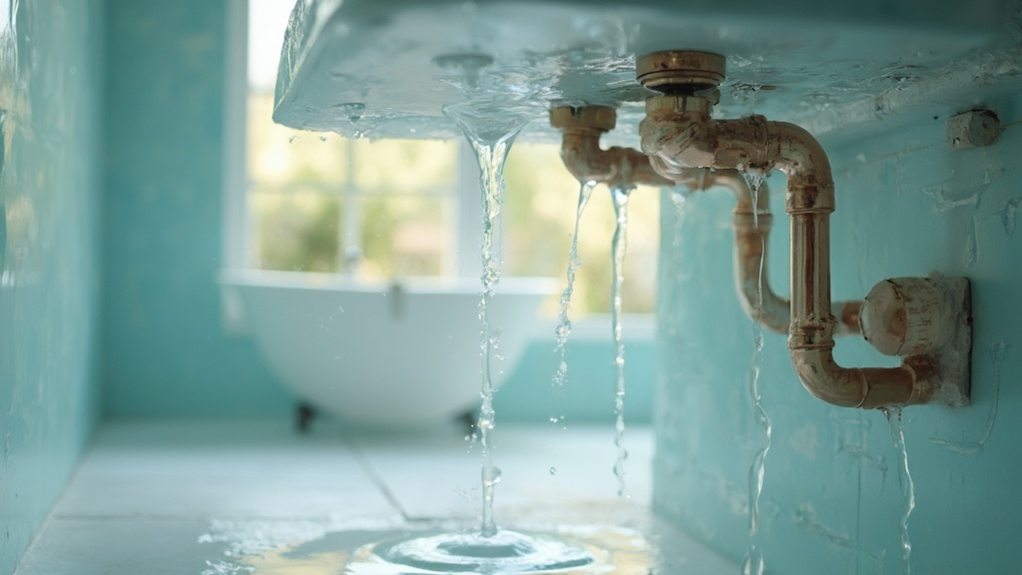
Regular inspection of kitchen cabinets can reveal critical warning signs of plumbing issues, including water stains, dampness, or pooling water beneath the sink.
The connection points and valves inside cabinets are common sources of leaks, requiring careful examination of supply lines, drain pipes, and fittings for signs of corrosion or wear.
Water damage in storage areas often manifests through warped materials, discoloration, or musty odors, which indicate the presence of hidden moisture that requires immediate attention from a qualified plumber.
Under-Sink Warning Signs
Five critical warning signs under your kitchen sink can alert you to potential plumbing leaks before they cause extensive damage. Regular inspection of this area is essential, as leaking pipes can lead to significant water damage that may spread to underneath floors and surrounding cabinetry.
Key Warning Signs to Monitor:
- Visible dampness or water stains on cabinet surfaces, particularly at pipe joints and connections
- Formation of puddles or pooling water beneath plumbing fixtures, indicating active leaks
- Corrosion or rust development on metal pipes and fittings, which suggests ongoing moisture exposure
- Musty odors or signs of mold growth, especially in dark corners of the cabinet space
- Warped or deteriorating cabinet materials due to prolonged water exposure
When inspecting under-sink areas, use adequate lighting and examine all surfaces thoroughly, including the back wall of the cabinet and flooring.
Pay particular attention to areas around pipe penetrations and seals, as these are common leak points. If multiple warning signs are present, especially visible water accumulation or signs of mold, contact a licensed plumber immediately to prevent further deterioration of your plumbing system.
Connection Points and Valves
Inside kitchen cabinets, connection points and valves represent major vulnerability zones for plumbing leaks. Regular inspection of these areas helps identify potential issues before they develop into costly water damage problems that could affect cabinetry and flooring.
Key Inspection Points:
- Water Supply Connections: Check the metal or flexible lines connecting to faucets and appliances for signs of water damage, including rust, corrosion, or dampness around fitting points.
- Shut-off Valves: Test all valves beneath the sink by turning them slowly, and examine the surrounding area for moisture or dripping that could indicate seal deterioration.
- Appliance Hookups: Inspect connections to dishwashers and other water-using appliances, looking specifically for pooling water or wet spots near hose attachments.
Visual Inspection Process:
- Use a flashlight to thoroughly examine dark corners and hidden areas.
- Look for discoloration on cabinet walls or floors.
- Check for mold growth, which often indicates ongoing moisture issues.
- Monitor connection points during appliance operation.
- Document any changes in moisture patterns or new water stains.
Regular maintenance of these connection points and valves can prevent extensive water damage and extend the life of plumbing components.
Storage Area Water Damage
Kitchen cabinets' storage areas serve as essential indicators of hidden plumbing problems, often revealing water damage before it becomes catastrophic.
Regular inspection of these spaces can help homeowners identify potential issues before they lead to extensive damage and costly repairs.
When examining cabinet interiors, look for these key indicators:
- Discoloration or warping of cabinet materials, particularly on walls and floors
- Signs of dampness or water pooling at the bottom of cabinets
- Rust or corrosion on visible plumbing components
- Water-stained items or boxes stored within the cabinets
- Musty odors indicating potential mold growth
To conduct a thorough inspection:
- Remove all stored items and examine them for moisture damage
- Check all visible pipes and connections for signs of corrosion
- Run your hand along cabinet surfaces to detect dampness
- Inspect corners and seams where water typically accumulates
- Look for signs of a slow leak, such as water rings or staining
Pay particular attention to cabinets beneath sinks and those adjacent to water supply lines, as these areas are most susceptible to plumbing leaks and subsequent water damage.
Inspect Bathroom Fixtures
To detect toilet tank leaks, add several drops of food coloring to the tank and observe whether the dye appears in the bowl within ten minutes without flushing.
A persistent drip from a showerhead requires immediate attention, as this seemingly minor issue can waste thousands of gallons of water each year and increase utility costs.
Regular inspections of toilet seals and shower fixtures, combined with prompt repairs when issues arise, help prevent extensive water damage and maintain efficient bathroom plumbing systems.
Check Toilet Tank Seal
A leaky toilet tank can waste hundreds of gallons of water monthly while inflating utility bills. To check toilet tank seal integrity, perform a simple food coloring test by adding several drops to the tank water and waiting 10 minutes without flushing.
| Inspection Area | Signs of Leakage | Required Action |
|---|---|---|
| Tank Seal | Colored water in bowl | Replace tank-to-bowl gasket |
| Flapper Valve | Continuous water flow | Install new flapper |
| Base & Supply Line | Moisture or stains | Tighten connections or replace |
Regular inspection of critical toilet components helps identify plumbing issues before they become major problems. Check the flapper valve for signs of wear, as this common failure point allows water to continuously flow from tank to bowl. Examine the area around the toilet's base and underneath the tank for moisture accumulation, which often indicates failing seals or loose connections.
The tank-to-bowl gasket requires particular attention during inspection, as deterioration may not be immediately visible but can cause significant water damage over time. Monitor the toilet's supply line and shut-off valve for signs of corrosion, rust, or water stains, addressing any issues promptly to prevent costly repairs.
Monitor Shower Head Drips
Maintaining vigilance over shower head performance is essential for preventing water waste and maintaining efficient bathroom fixtures. Regular inspections can identify potential leaks early, preventing the substantial loss of over 3,000 gallons of water annually from a single dripping shower head.
Key Inspection Points:
- Check connection points between the shower arm and shower head, ensuring all fittings are properly tightened.
- Use a clean, damp cloth to wipe around the shower head base, looking for unexpected moisture accumulation.
- Listen carefully for dripping sounds when the shower is not in use.
- Examine the shower head surface for visible water droplets or constant drips.
If you discover a leak, immediate repair or replacement is recommended to prevent water waste. Consider upgrading to a water-efficient model, which not only reduces water consumption but also incorporates modern sealing technology to minimize leak potential.
Preventive Measures:
- Perform monthly inspections of all shower heads.
- Clean mineral deposits that can cause irregular spray patterns.
- Replace worn washers and O-rings at first signs of deterioration.
- Document inspection dates and findings to track fixture performance over time.
Look For Discolored Walls
Discolored walls serve as telltale indicators of hidden plumbing leaks within your home. When water accumulates behind walls due to compromised pipes or connections, it often manifests as visible stains or deterioration of wall surfaces. These signs of water damage typically appear as yellowish or brownish patches, particularly in areas adjacent to plumbing fixtures and water supply lines.
Key indicators of potential plumbing leaks include:
- Yellow or brown water stains spreading across walls or ceilings
- Bubbling or peeling paint, indicating moisture trapped beneath the surface
- Warped or softened drywall that feels spongy to the touch
- Visible mold or mildew growth, especially in corners or along baseboards
Regular inspection of walls near bathrooms, kitchens, and laundry areas can help detect leaks early. Pay particular attention to areas surrounding pipes, faucets, and fixtures where water connections exist.
When examining discolored walls, press gently on suspicious areas to check for softness, as compromised drywall often loses structural integrity. If you discover any combination of these warning signs, especially accompanied by mold growth, contact a licensed plumber immediately for professional assessment and repairs.
Listen For Hidden Drips
Silent vigilance plays an essential role in detecting hidden plumbing leaks through careful listening for telltale drips and unusual water sounds. The most effective detection occurs in quiet environments, typically during nighttime hours when background noise is minimal and water-related sounds become more distinguishable.
To effectively listen for hidden plumbing leaks:
- Turn off all water-using appliances and fixtures
- Pay attention to hissing sounds, which often indicate pressurized leaks within walls
- Monitor for unexpected water running sounds when no fixtures are in use
- Check areas around water heaters, washing machines, and under-sink spaces
For enhanced detection capabilities, utilize a stethoscope or electronic listening device to amplify subtle sounds. These tools help isolate the exact location of water movement within plumbing systems, particularly in walls or beneath flooring.
Place the device directly against pipes, joints, and suspected leak areas while listening for consistent dripping or flowing sounds.
Regular acoustic monitoring serves as a preventive measure, allowing homeowners to identify potential leaks before they develop into major issues. This proactive approach helps avoid extensive water damage and reduces long-term repair costs.
Examine Outdoor Irrigation Systems
While indoor plumbing leaks can be detected through careful listening, outdoor irrigation systems require visual inspection and systematic checking to identify potential water loss.
Regular monitoring of outdoor plumbing components helps prevent costly water waste and maintain system efficiency throughout the watering season.
Key areas to inspect include:
- Spigot and hose connections, which can waste up to 6,300 gallons monthly if connections are faulty
- Underground irrigation lines, often indicated by unusually wet or green patches in the lawn
- System fittings and joints, where loose connections can lead to significant water seepage
- Seasonal maintenance points, including valves, sprinkler heads, and control mechanisms
To effectively monitor your irrigation system, conduct thorough inspections at least annually before the watering season begins.
Check all connections for tightness and security, paying special attention to areas where pipes join or change direction. Water seepage at these points can quickly escalate into major leaks if left unaddressed.
When you discover issues, prompt repair of compromised components will prevent water waste and protect your system's long-term functionality.
Test Appliance Water Lines
Regular inspection of appliance water lines serves as a critical preventive measure against household water damage. The process involves systematically examining connections where water supply lines meet major appliances, including dishwashers, washing machines, and refrigerators.
Key Inspection Steps:
- Run a clean towel or cloth around connection points to detect moisture, which often indicates slow leaks that might otherwise go unnoticed.
- Check underneath appliances for water pooling, particularly after usage cycles.
- Verify that hoses are securely attached and free from kinks or bends.
- Examine hoses for signs of deterioration, such as cracks, bulging, or corrosion.
Annual Maintenance Protocol:
- Inspect all water line connections.
- Test flexibility and integrity of hoses.
- Confirm proper fitting at both appliance and wall connections.
- Document any signs of wear or potential issues.
Taking these preventive steps helps identify potential problems before they develop into costly repairs.
When testing appliance water lines, pay particular attention to connection points where vibration or movement might cause loosening over time. Early detection of minor issues can prevent major water damage and preserve appliance functionality.
Track Monthly Water Bills
Beyond physical inspections of plumbing components, tracking monthly water bills provides a reliable method for detecting potential leaks in your home's plumbing system. Monitoring your water usage through bills can reveal hidden leaks before they cause significant damage, with increases of 10% or more warranting immediate attention.
Key indicators to monitor when tracking water bills include:
- Sudden increases in costs without changes in household water consumption patterns
- Unexplained spikes of more than 10% compared to previous months
- Unusual increases during winter months when water usage typically decreases
- Consistent upward trends in usage over several billing cycles
Regular analysis of water bills serves as an early warning system for plumbing issues, helping homeowners identify problems that may otherwise go unnoticed.
The average household loses approximately 10,000 gallons annually through leaks, making consistent monitoring essential for maintenance. When unusual spikes in water usage are detected, scheduling professional plumbing inspections promptly can prevent costly repairs and water waste.
Maintaining detailed records of monthly bills creates a valuable baseline for comparing usage patterns and identifying potential leaks throughout the year.
Assess Yard Moisture Patterns
Identifying unusual moisture patterns in your yard serves as a crucial indicator of potential plumbing leaks beneath the surface. When underground pipes develop leaks in your home, they often create distinct signs that can be observed through careful inspection of your outdoor spaces.
Key Indicators to Monitor:
- Unusually lush or vibrant grass patches, which suggest concentrated water flow from compromised pipes
- Persistent wet spots that remain damp even during dry weather conditions
- Areas where water pools instead of properly draining after rainfall
- Formation of mold or mildew in outdoor spaces, particularly in shaded areas
- Consistently moist soil around irrigation systems or outdoor plumbing fixtures
To effectively assess yard moisture patterns:
- Walk your property regularly, particularly after dry spells
- Document areas where grass appears greener or grows faster than surrounding areas
- Monitor drainage patterns during and after precipitation
- Check for soft or spongy ground, which may indicate water accumulation
- Inspect areas around visible plumbing components, such as outdoor spigots or irrigation control valves
Early detection of these moisture-related signs can prevent extensive water damage and reduce repair costs considerably.
Frequently Asked Questions
What Is One Easy Way to Check for Plumbing Leaks in the Home?
Water meter monitoring provides a reliable method for detecting plumbing leaks.
First, turn off all water sources in your home, including faucets, appliances, and irrigation systems.
Check the water meter's reading, then wait approximately two hours without using any water.
If the meter shows movement or a different reading after this period, it indicates a leak in your plumbing system.
This simple visual inspection tip helps homeowners identify common leak signs early.
How Do I Find Out Where My Water Is Leaking From?
To locate water leaks, employ several leak detection methods starting with water meter monitoring – check for movement when all water sources are off.
Look for visual leak clues like water stains, discoloration, or dampness on walls, floors, and ceilings.
Use moisture detection tools around plumbing fixtures and appliances for precise identification.
Conduct seasonal leak checks of exposed pipes, and perform toilet leak tests using food coloring in the tank.
How Do I Know if My Water Pipe Is Leaking Underground?
To detect underground water pipe leaks, employ multiple detection methods for accurate diagnosis.
Monitor water pressure changes and inspect soil moisture levels around your property, looking for unusually damp areas.
Modern leak indicators include acoustic methods to identify dripping sounds and infrared technology to detect temperature variations in the ground.
Professional pipe inspection services can use specialized equipment to pinpoint exact leak locations through non-invasive underground detection techniques.
How Do I Find a Leak in My Plumbing Vent?
To locate a plumbing vent leak, begin with a thorough visual inspection of the vent pipe and roof penetration point for cracks or damage.
Check for moisture buildup and water stains in the attic around the vent system.
Listen for airflow issues like gurgling sounds, which may indicate vent blockage or leaks.
For precise leak detection, examine pipe joints and connections using a flashlight.
If issues persist, consider professional plumbing inspection services.
Final Thoughts
Effective plumbing leak detection requires systematic monitoring and regular inspection of key household water systems. Through careful observation of water meters, fixture connections, and structural indicators like wall discoloration, homeowners can identify potential issues before they become major problems. Combining visual inspections with auditory checks and usage tracking creates a thorough approach to leak detection. Early identification, followed by prompt professional repairs, prevents water waste and minimizes property damage while maintaining plumbing system integrity.


